Maintaining a lawn mower is essential for ensuring its longevity and performance. One crucial component that often requires attention is the ignition coil, a vital part of the lawn mower’s engine. Over time, ignition coils can wear out or fail, leading to the mower’s starting problems or irregular running. Recognizing the symptoms of a failing ignition coil, such as difficulty starting the engine, misfiring, or an engine that stops running shortly after starting, is vital for timely replacement. This article provides a comprehensive guide on replacing the ignition coil on your lawn mower. It ensures that your equipment continues functioning efficiently and effectively. Whether you’re a seasoned DIY enthusiast or new to lawn mower maintenance, this step-by-step guide will walk you through the process, from understanding the role of the ignition coil to testing the newly installed component.
As a DIY enthusiast, our guide on replacing a fireplace insert or how to test your solar panels may interest you!
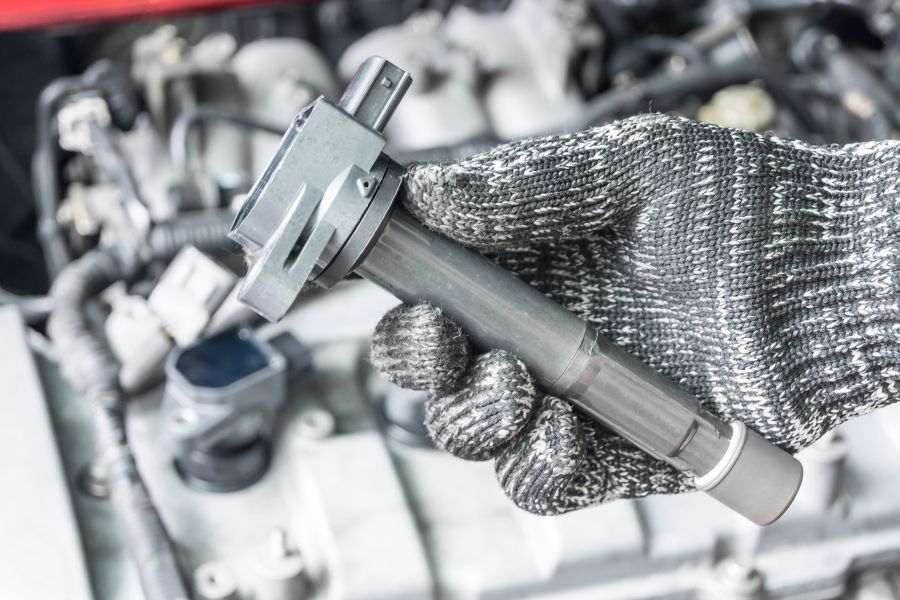
How Does the Ignition Coil Work?
The ignition coil in a lawn mower is an integral part of the engine’s ignition system. It functions as a compact electrical transformer, converting the low voltage from the mower’s battery into the high voltage needed to create a spark at the spark plug. This spark is crucial for igniting the fuel-air mixture within the engine’s cylinders, which powers the mower.
Here’s a breakdown of how the ignition coil works:
- Voltage Conversion: When the lawn mower’s engine is started, the ignition coil receives a low-voltage signal from the battery. This voltage is typically around 12 volts in a standard lawn mower.
- Magnetic Field Creation: Inside the ignition coil are two sets of primary and secondary windings. When the current flows through the primary winding, it creates a magnetic field around it.
- Voltage Amplification: As the engine runs, the flywheel, which contains magnets, rotates around the ignition coil. This changing magnetic field induces a current in the coil’s secondary winding. The secondary winding has significantly more wire turns than the primary winding, which amplifies the voltage. This amplification process can increase the voltage from 12 volts to 20,000 volts or more.
- Spark Generation: This high voltage is then sent to the spark plug. The extreme voltage difference between the electrodes of the spark plug causes a spark to jump across the gap of the spark plug. This spark ignites the fuel-air mixture in the engine’s combustion chamber, driving the engine.
- Timing and Interruption: The ignition system is designed to deliver the spark at precisely the right moment. This timing is controlled by the mower’s ignition module and flywheel positioning. The breaking and closing of the circuit in the primary winding, often controlled electronically in modern mowers, play a crucial role in spark timing.
How to Replace Ignition Coil on Your Lawn Mower
Preparing for Replacement
Before replacing the lawn mower ignition coil, preparing correctly is essential to ensure a smooth and safe process. Here are the steps to get ready:
- Safety First: Always disconnect the spark plug wire to prevent accidental starts. Ensure the lawn mower is on a stable, flat surface.
- Gather Tools and Parts: You will need a set of screwdrivers, a socket set, and possibly a feeler gauge for setting the ignition coil air gap. Ensure you have the correct new ignition coil for your lawn mower model.
- Accessing the Ignition Coil: Remove any covers or parts obstructing access to the ignition coil. This may involve removing the mower’s housing or protective shrouds.
- Identify the Ignition Coil: Locate the ignition coil; it’s usually situated near the flywheel. The process may vary slightly for breaker point ignition systems, so refer to your mower’s manual.
- Check the Flywheel and Area: Inspect the magnets and surrounding area to ensure no debris or damage could affect the new ignition coil.
Removing the Old Ignition Coil
Once you’re prepared, follow these steps to remove the ignition coil:
- Locate Mounting Screws: The ignition coil is held in place by mounting screws. Identify these screws for removal.
- Disconnect the Spark Plug Wire: Carefully disconnect the spark plug wire from the ignition coil. If the wire is damaged or worn, consider replacing it with the coil.
- Remove the Ignition Coil Mounting Screws: Use the appropriate screwdriver or socket to remove the ignition coil mounting screws. Keep these screws safe, as they’re often reused for installing the new ignition coil.
- Detach the Ignition Coil: Once the mounting screws are removed, gently detach the ignition coil from its position. Be cautious not to damage any nearby wiring or components.
- Note the Ignition Coil Air Gap: Before completely removing the ignition coil, observe the gap between the ignition coil and the flywheel magnets. This is the ignition coil air gap, and it will need to be replicated when installing the new coil.
- Remove the Ignition Coil: Carefully lift and remove the ignition coil from the lawn mower, ensuring you do not disturb the flywheel or other nearby components.

Installing the New Ignition Coil
Once the old ignition coil is removed, follow these steps to install the new one:
- Positioning the New Ignition Coil: Place the new ignition coil in the area where the old one was removed. Ensure it’s oriented correctly, matching the design of the old coil.
- Aligning with Mounting Screw Holes: Align the new ignition coil with the mounting screw holes where the previous coil was attached. This ensures proper placement for optimal function.
- Attaching the Coil Grounding Lead: If your model has a coil grounding lead, connect it to the new ignition coil. This is crucial for the proper operation of the ignition system.
- Securing with Mounting Screws: Use the previously removed mounting screws to secure the new ignition coil in place. Do not over-tighten, as this may damage the coil or the mower’s body.
- Setting the Ignition Coil Air Gap: Adjust the distance between the ignition coil and the flywheel magnets to the recommended ignition coil air gap. Use a feeler gauge to measure and set this gap accurately.
- Reconnecting to the Engine’s Wiring Harness: Connect the new ignition coil to the engine’s or equipment wiring harness. Ensure all connections are secure and properly aligned.
- Reattaching the Spark Plug Wire: Connect the spark plug wire to the new ignition coil. Make sure it is securely in place for a solid connection.
- Reassembling the Blower Housing: Once you install the new ignition coil, reassemble the blower housing and any other removed parts.
Testing and Troubleshooting
After installing the new ignition coil, it’s essential to test it and troubleshoot any issues:
- Testing the Ignition System: Start the lawn mower to check the function of the new ignition coil. The engine should start smoothly if the coil is working properly.
- Observing Engine Performance: Let the engine run for a few minutes and observe. Listen for smooth running and watch for any unusual behavior.
- Ignition System Troubleshooting: If the mower does not start or runs erratically, you may need to perform ignition system troubleshooting. Check if you’ve properly connected the ignition coil, set the air gap correctly, and the wiring has no loose connections.
- Checking the Spark Plug: Sometimes, issues may not be with the coil but with the spark plug. Ensure the spark plug is in good condition and properly gapped.
- Examining the Combustion Chamber: A problem in the combustion chamber can also affect ignition systems. Ensure no debris or blockage in the combustion chamber could impede the engine’s operation.
- Consulting the Manual: If problems persist, consult your lawn mower’s manual for specific ignition system troubleshooting tips related to your model.
- Seeking Professional Help: If you cannot resolve the issue, it may be best to seek help from a professional. They can diagnose and fix complex issues that might be beyond basic troubleshooting.
Maintenance Tips
To keep your lawn mower running smoothly and to extend the life of its components, including the ignition coil, follow these maintenance tips:
- Regular Inspections: Inspect the ignition coil and other parts for signs of wear or damage. Look for cracks, loose connections, or signs of corrosion.
- Clean the Ignition System: Keep the area around the ignition coil clean. Remove debris, dust, or grass clippings that can accumulate around the blower housing and the ignition system.
- Check the Spark Plug: Regularly check and clean the spark plug. Replace it if worn or damaged, as a faulty spark plug can put undue stress on the ignition coil.
- Monitor the Flywheel Magnets: Inspect the flywheel magnets periodically to ensure they are clean and in good condition, as they play a crucial role in the functioning of the ignition coil.
- Adhere to a Service Schedule: Follow the manufacturer’s service schedule for your lawn mower. Regular servicing can identify and fix issues before they become significant problems.
- Be Mindful of Symptoms: Pay attention to signs of ignition coil failure, such as difficulty in starting the mower, engine misfires, or inconsistent engine performance.
- Use Quality Replacement Parts: When replacing the ignition coil or any other component, use quality parts compatible with your lawn mower model.
Over to You
Replacing the ignition coil on a lawn mower is a vital maintenance task that ensures your mower runs efficiently. The process involves careful removal of the old coil, precise installation of the new one, and thorough testing to ensure everything functions correctly. Regular maintenance of the ignition system, including the ignition coil, spark plug, and associated components, is crucial for your lawn mower’s longevity and optimal performance. By following the guidelines outlined in this article, homeowners and lawn care enthusiasts can confidently undertake to replace the ignition coil on their lawn mowers, ensuring their equipment remains reliable and effective for years to come.