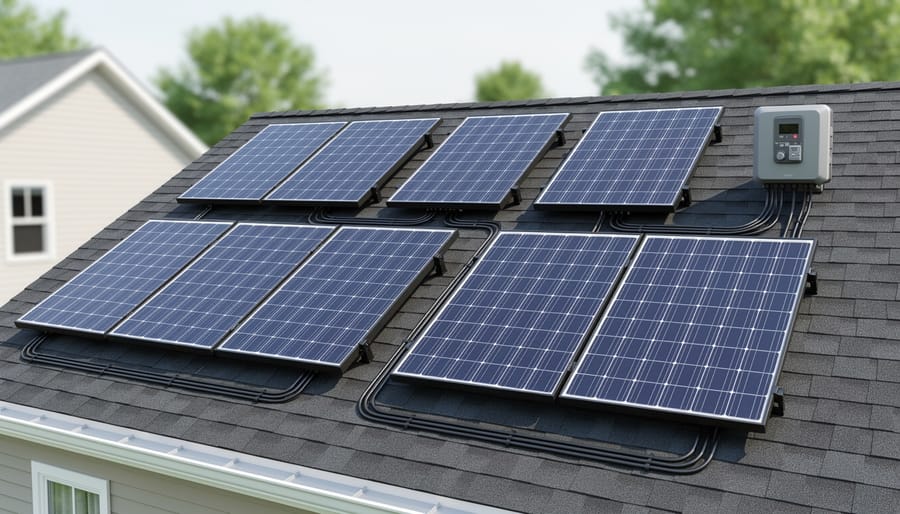
Wiring eight solar panels in series-parallel combines two 4-panel strings in parallel, delivering balanced voltage and amperage that most home inverters require while protecting your system from partial shading losses. This configuration typically produces 96-100 volts and doubles your amperage output, making it the sweet spot for residential installations between 2.4kW and 3.2kW. You’ll complete this project in about two hours with basic electrical skills, a few MC4 connectors, and proper safety gear.
The beauty of this hybrid approach lies in how it solves the fundamental trade-off every solar installer faces. Wire panels purely in series and you’ll get high voltage but limited current; go purely parallel and you’ll face voltage drops that many inverters can’t handle. By splitting your eight panels into two separate strings of four, then joining those strings together, you create a system that performs reliably even when a few panels sit in shadow during morning or afternoon hours.
This matters deeply for families investing in their dream home’s energy future. The difference between a well-wired array and a haphazard one can mean thousands of dollars over your system’s 25-year lifespan. String voltages must stay within your inverter’s operating window, wire gauge must handle the combined amperage without overheating, and every connection needs weather-tight integrity.
What follows is the complete roadmap for this specific configuration. We’ll walk through exactly which materials to gather, the safety protocols that protect both you and your investment, and the precise sequence of connections that transforms eight separate panels into one cohesive power source. You’ll also learn how to verify your work before flipping the switch.
Understanding Series-Parallel Solar Panel Configuration
Before you start wiring your solar panels, you need to grasp how series and parallel connections work, and why combining them gives you the most efficient setup for a home system.
When you wire solar panels in series, you connect the positive terminal of one panel to the negative terminal of the next. This increases your total voltage while keeping amperage (current) the same. Think of it like stacking batteries end-to-end: four 12-volt panels in series deliver 48 volts. Series wiring is excellent for minimizing power loss over long wire runs and matching higher-voltage inverter requirements.
Parallel wiring works differently. You connect all positive terminals together and all negative terminals together, which increases your total amperage while voltage stays constant. Four panels producing 5 amps each will output 20 amps when wired in parallel. This configuration provides more current capacity but maintains the voltage of a single panel.
The beauty of an 8-panel series-parallel setup for your home lies in this balance. The most common approach divides your 8 panels into two strings of four panels each. Within each string, the four panels connect in series (boosting voltage), then you connect the two strings in parallel (doubling your amperage). This gives you the voltage your inverter needs while providing enough current to power your home effectively.
For residential applications, this configuration offers practical advantages beyond electrical efficiency. If one panel in a series string underperforms due to shading or debris, only that string’s output drops, the parallel string continues operating normally. You’re not putting all your eggs in one basket. The setup also fits neatly on most residential roofs, allowing for logical placement in two rows or sections that accommodate roof geometry and shading patterns.
This balanced approach matches what most grid-tie and off-grid inverters expect: a voltage range typically between 48-96 volts with sufficient amperage to generate meaningful household power. It’s why the 8-panel series-parallel configuration has become a go-to choice for homeowners building custom solar solutions.
Tools and Materials You’ll Need
Before you start connecting your solar panels, gather everything you’ll need to complete the job safely and efficiently. Having all materials on hand prevents mid-project trips to the hardware store and ensures you can work methodically through each step.
Essential Equipment Checklist:
- Eight solar panels (verify identical specifications: same wattage, voltage, and amperage)
- MC4 connectors (male and female pairs, plus spares for contingencies)
- Solar-rated wire in appropriate gauge (typically 10 AWG for most residential setups; 8 AWG for longer runs or higher amperage)
- Combiner box or junction box (weatherproof, rated for your system’s voltage and current)
- Wire strippers designed for 10-12 AWG wire
- MC4 crimping tool (standard crimpers won’t properly secure MC4 connections)
- Digital multimeter capable of measuring DC voltage and current
- Insulated tools (screwdrivers, pliers, wrenches with non-conductive handles)
- Cable ties and wire management clips for organizing connections
- Electrical tape and heat-shrink tubing for additional weatherproofing
- Safety glasses, insulated gloves, and non-conductive footwear
- Opaque covers or tarps to block sunlight from panels during installation
- Permanent marker or label maker for identifying strings and connections
Don’t skimp on wire quality. Choose wire specifically rated for solar applications with UV-resistant insulation, since outdoor exposure degrades standard electrical wire quickly. Your wire gauge matters tremendously: undersized wire creates voltage drop and heat buildup that reduces efficiency and poses fire risk.
Most hardware stores carry basic electrical supplies, but you’ll likely need to visit a solar specialty retailer or order online for MC4 connectors, proper crimping tools, and solar-rated wire. Budget roughly $150-250 for tools and materials beyond the panels themselves, though quality tools represent a one-time investment you’ll use for years of system maintenance.
Safety Precautions Before You Begin
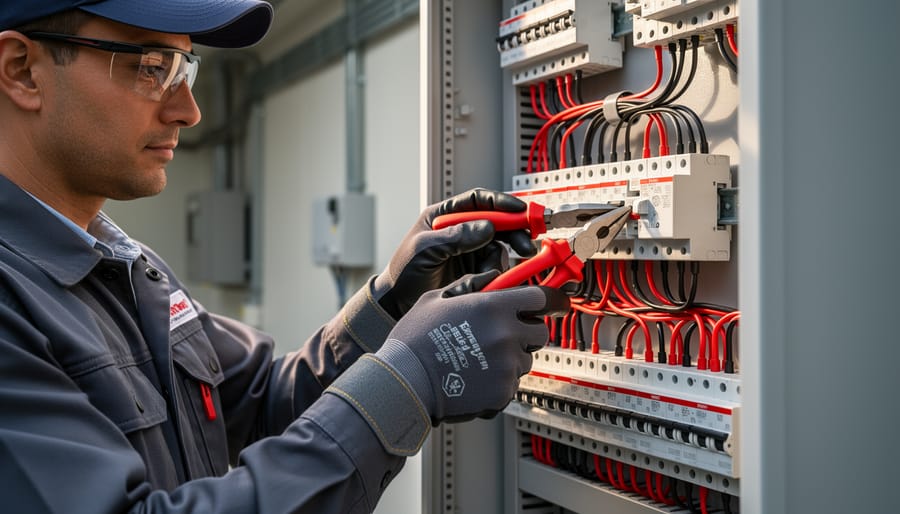
Working with solar panels means handling potentially lethal DC voltage, and unlike AC current, DC doesn’t let go once it grabs you. Even an 8-panel system generates enough voltage and amperage to cause serious injury or death, so treating this project with the same caution you’d apply to any electrical work is non-negotiable.
Before you touch a single wire, schedule your installation for early morning, late evening, or an overcast day when solar output is minimal. Better yet, completely cover each panel with an opaque tarp or thick blanket to eliminate power generation entirely. Sunlight hitting those panels creates immediate voltage, and there’s no “off” switch until you block the light source.
Your tools matter as much as your technique. Use only insulated screwdrivers, wire strippers, and crimpers with rubber-coated handles rated for electrical work. A quality multimeter rated for at least 600V DC is essential for testing, and never skip wearing rubber-soled shoes and insulated gloves during the installation process. Keep a fire extinguisher rated for electrical fires nearby, just in case.
Know your limits and the law. Most jurisdictions require licensed electricians to make final connections to your home’s electrical system, and many mandate permits for solar installations of any size. These aren’t bureaucratic hurdles, they’re safeguards ensuring your system won’t start a fire or energize your home’s frame during a fault. If you’re uncomfortable with any step, particularly the final inverter connections or working near your main service panel, hire a professional. The best custom home projects balance DIY pride with professional expertise where it counts, and electrical safety is where it counts most.
Planning Your 8-Panel Series-Parallel Layout
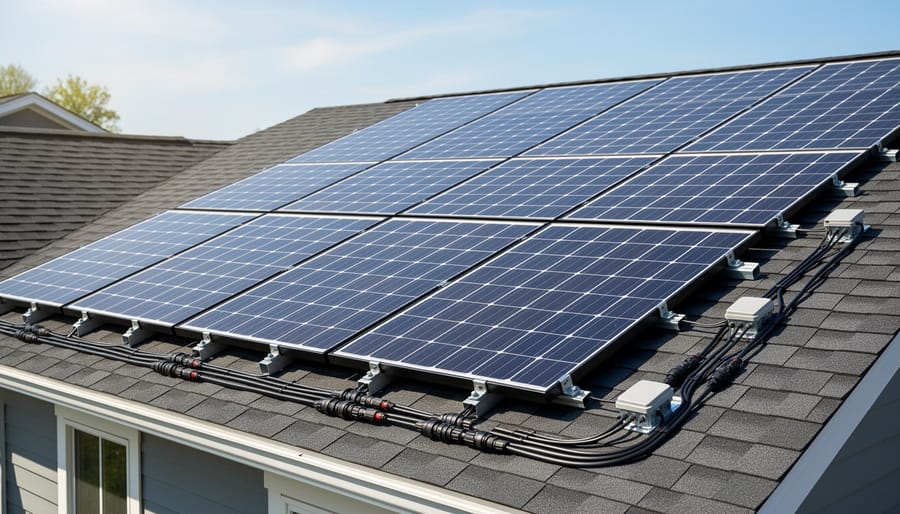
Before you climb onto your roof with wire and connectors, take time to map out exactly how those eight panels will connect. The right configuration on paper prevents costly mistakes and ensures your system delivers the power your home needs.
The most popular approach for eight panels is creating two parallel strings of four panels each in series, often called a 4S2P configuration. Here’s why this works so well: when you wire four panels in series, you multiply the voltage of a single panel by four while keeping the amperage the same. If each panel produces 40 volts and 10 amps, your series string outputs 160 volts at 10 amps. When you then connect two of these strings in parallel, your voltage stays at 160 volts but your amperage doubles to 20 amps.
Some installations use 2S4P instead, two panels in series, creating four parallel strings. This configuration keeps voltage lower (around 80 volts) but increases amperage to 40 amps. Which one should you choose? It depends entirely on your inverter specifications.
Pull out your inverter’s datasheet and look for three critical numbers: maximum input voltage, operating voltage range, and maximum input current. Your series-parallel design must keep your system’s output within these boundaries. If your inverter accepts up to 200 volts but only 25 amps, the 4S2P configuration fits perfectly. If it handles 50 amps but maxes out at 100 volts, you’ll want 2S4P.
Grab a calculator and work through the math with your actual panel specs. Multiply one panel’s voltage by the number in your series string, then multiply one panel’s amperage by the number of parallel strings. Write these totals down, you’ll need them when testing your completed installation.
Sketch your layout on paper, numbering each panel and marking which ones connect in series within each string. Note where you’ll dispose wiring waste from cutting cables to length. This simple diagram becomes your roadmap during installation and an invaluable reference if you ever need to troubleshoot down the line. Keep it with your home’s electrical documentation.
Step-by-Step Wiring Process
Step 1: Create Your Series Strings
Start by positioning your first four panels in their permanent mounting location, ensuring each panel faces the same direction and receives consistent sunlight exposure. Before making any connections, verify each panel’s polarity markings, typically indicated by plus and minus symbols near the junction box on the back of each panel.
Take the positive lead from Panel 1 and connect it to the negative lead of Panel 2 using MC4 connectors. Simply push the male connector firmly into the female connector until you hear a click, confirming a secure connection. This click means the internal locking mechanism has engaged properly. Repeat this process by connecting Panel 2’s positive lead to Panel 3’s negative lead, then Panel 3’s positive to Panel 4’s negative. You’ve now created your first series string of four panels.
Before moving forward, perform basic solar panel testing with your multimeter. Touch the red probe to the positive lead remaining on Panel 4 and the black probe to the negative lead on Panel 1. If your panels are rated at 40 volts each, this multimeter verification should show approximately 160 volts, confirming your series connection multiplies the voltage correctly.
Once verified, duplicate this exact process with your remaining four panels to create your second identical series string.
Step 2: Connect Strings in Parallel
With your two series strings complete, you’re ready to join them in parallel. This step combines the current from both strings while maintaining the voltage of a single string.
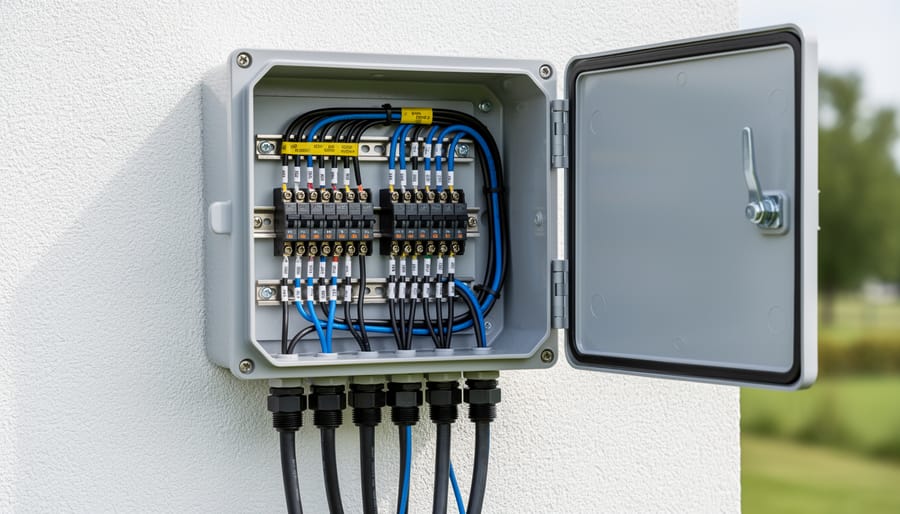
Locate the positive and negative leads from each of your four-panel strings. You’ll connect these to a combiner box or junction box, your central hub where parallel wiring happens. Run the positive lead from String 1 to one positive busbar or terminal in the box. Do the same with the positive lead from String 2, connecting it to the same positive terminal or busbar. Repeat this process for the negative leads, joining both negative wires to a common negative terminal.
Use appropriately sized wire connectors or busbars rated for your system’s amperage. Since parallel wiring adds current, your combined output will be roughly double what one string produces. Secure each connection firmly, loose wiring creates resistance, heat, and potential fire hazards.
Before closing the box, inspect every connection. Tug gently on each wire to confirm it’s seated properly. Route wires neatly inside the box to prevent pinching or strain on connections. Apply dielectric grease to exposed metal contacts to prevent corrosion, especially in humid climates.
Weatherproofing matters tremendously. Use cable glands or rubber grommets where wires enter the combiner box to seal against moisture. Mount the box in a location protected from direct weather exposure when possible. Once satisfied with your connections, close and secure the box lid, ensuring gaskets seat properly to maintain the weather-resistant rating.
Step 3: Wire to Your Charge Controller or Inverter
With your two series strings now connected in parallel, you’re ready to route power into your home’s electrical system. This final wiring step demands extra attention to detail, improper connections here can damage expensive equipment or create safety hazards.
Start by double-checking polarity with your multimeter. Touch the red probe to your positive output wire and the black probe to negative. The reading should match your calculated system voltage (typically 96-144V for eight panels in this configuration). If you get a negative reading, swap your probe placement, the wires are reversed.
Before making any connections, confirm your charge controller or inverter is rated for both your system’s voltage and amperage. Most residential grid-tie inverters handle this configuration easily, but verify the specs match your output.
Strip the wire ends carefully, leaving just enough exposed copper for a secure connection, typically half an inch. Insert the positive wire from your combiner box into the positive terminal on your controller, then tighten firmly with a screwdriver. Repeat for the negative connection. Give each wire a gentle tug to ensure it won’t pull loose.
Ground your system properly by connecting the grounding wire from your array to the designated ground terminal on your inverter, then run this to your home’s grounding system. Never skip grounding, it protects your equipment and your family from electrical faults and lightning strikes.
Step 4: Label and Organize Your Wiring
Label each wire at both ends using weatherproof tags or heat-shrink labels. Mark your two series strings as “String 1” and “String 2,” and identify positive and negative leads clearly. Inside your combiner box, label which terminals connect to which string.
Take photos of your completed configuration and sketch a simple diagram showing how your panels connect. Note the panel serial numbers, their positions on your roof, and which string each belongs to. Store this documentation with your home’s electrical records.
Use cable ties or conduit to keep wires neat and protected from weather. Bundle wires from each string separately, leaving enough slack for thermal expansion but keeping everything secure. This organization prevents accidental disconnections and makes future troubleshooting straightforward when you need to trace a connection or replace a component.
Testing and Verifying Your Installation
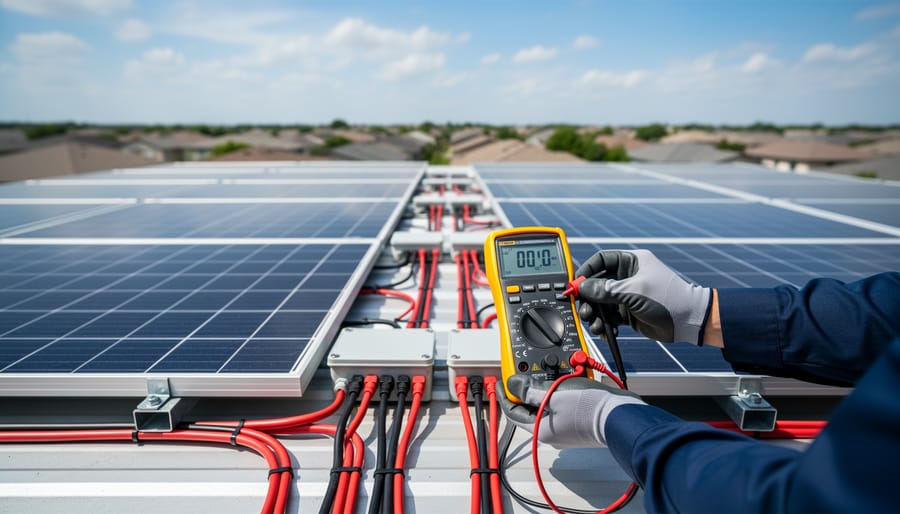
Testing your series-parallel configuration isn’t just about confirming power output, it’s about verifying that every connection functions safely and efficiently. Grab your multimeter and set aside at least an hour for thorough testing. The investment in careful verification now prevents headaches, equipment damage, and potential safety hazards down the road.
Start by testing in daylight with good sun exposure. Your multimeter will be your diagnostic partner throughout this process, revealing whether your wiring matches your design calculations. Before you begin, ensure all connections are secure and that you’ve cleared any installation debris from your work area, just as you’d manage jobsite debris during construction, maintaining a clean testing environment prevents accidents and false readings.
- Test individual panel output: Disconnect one panel and measure its open-circuit voltage (Voc) and short-circuit current (Isc). A typical 300W residential panel should show around 37-40V and 9-10A in full sun. Compare readings to your panel’s spec sheet, variations of more than 10% warrant investigation.
- Verify series string voltage: With panels connected in series (four panels per string), measure voltage across each complete string. You should see roughly 4 times your individual panel voltage, approximately 148-160V for four 300W panels. Current remains the same as a single panel.
- Check parallel connection output: At your combiner box, measure the final output where both strings join. Voltage should match a single string (148-160V), while amperage doubles, expect around 18-20A from two parallel strings. This confirms your parallel wiring is correct.
- Test under load conditions: With your inverter or charge controller connected (but the system not yet energized), verify polarity one final time. Then power up the system and monitor performance for the first few hours, checking that voltage and amperage remain stable.
If readings fall short, troubleshoot systematically. Low voltage in a series string often indicates a weak connection or a partially shaded panel. Low amperage in the parallel configuration suggests resistance in your positive or negative bus connections. Dramatically different readings between strings point to mismatched panels or a faulty unit.
Document your test results with photos and notes. Record the date, time, weather conditions, and all measurements. This baseline data proves invaluable for future maintenance and helps you track system performance over time. Many homeowners discover that this methodical testing approach mirrors the attention to detail that makes their custom home special, every element verified, nothing left to chance.
Common Mistakes to Avoid
The difference between a reliable solar installation and a frustrating one often comes down to avoiding preventable mistakes. Here are the most common pitfalls homeowners encounter when wiring 8 panels in series-parallel:
- Mismatched panel specifications: Using panels with different wattages, voltages, or amperages forces the system to perform at the level of your weakest panel, wasting the capacity of your better ones. Always use identical panels throughout your array.
- Undersized wire gauge: Selecting wire that’s too thin for your amperage creates voltage drop, heat buildup, and potential fire hazards. Calculate your maximum current and choose wire rated at least 25% higher than that figure.
- Loose or improperly crimped connections: Even slightly loose MC4 connectors create resistance points that reduce efficiency and can arc or corrode over time. Always test each connection with a firm tug before proceeding.
- Ignoring partial shading analysis: Placing panels where even one receives shade during peak hours drags down your entire string’s output. Map your roof’s sun exposure throughout the day before finalizing panel locations.
- Skipping voltage verification: Connecting to your inverter without confirming your configuration’s actual voltage output can damage expensive equipment instantly. Use a multimeter to verify readings match your calculations.
- Neglecting proper grounding: Skipping or incorrectly installing grounding wires puts your home at risk during lightning strikes or electrical faults. Follow NEC requirements precisely for all ground connections.
Beyond these technical errors, many installers rush through documentation, failing to label strings or record their configuration details. This oversight becomes costly when troubleshooting issues months later. Take photos of your wiring before closing junction boxes, and maintain a diagram showing which panels belong to which string.
Regular system performance checks catch emerging problems before they escalate, protecting your investment and ensuring your custom home’s solar array delivers the efficiency you designed it for.
Next Steps: Integrating Your System Into Your Home
With your 8-panel series-parallel system wired and tested, you’re ready to integrate this clean energy source into your home’s electrical infrastructure. This transition from standalone installation to fully functional power system requires careful coordination and professional oversight.
Connecting to Your Home’s Electrical Panel
Your series-parallel configuration must connect to your home through a dedicated circuit breaker in your main electrical panel. This step typically requires a licensed electrician who understands both solar integration and local electrical codes. They’ll install the appropriate disconnect switches, ensure proper grounding to your home’s grounding system, and verify that all connections meet safety standards. Never attempt to connect your solar system directly to your home’s electrical panel without professional assistance, this is where expertise truly matters for your family’s safety.
Scheduling Required Inspections
Most municipalities require electrical and solar-specific inspections before your system can go live. Contact your local building department to schedule these final walkthroughs. Inspectors verify wire gauge selections, proper labeling, code-compliant installation methods, and that your system matches approved permit drawings. Plan for this process to take one to three weeks depending on your location.
Setting Up System Monitoring
Modern inverters include monitoring capabilities that track daily production, system efficiency, and potential issues. Install the manufacturer’s app or monitoring platform to watch your eight panels perform in real time. This visibility helps you catch problems early and understand your energy patterns throughout the seasons.
Establishing Maintenance Routines
Schedule quarterly visual inspections of your panels and annual professional checkups. Clean panels as needed, check connections for corrosion, and document performance trends. This proactive approach protects your investment and ensures your custom home continues benefiting from reliable solar power for decades to come.
Frequently Asked Questions
As you finalize your 8-panel solar installation, you’ll likely have questions about specific scenarios and system capabilities. Here are answers to the most common concerns homeowners face with series-parallel configurations.
Can I mix different panel brands or wattages in a series-parallel setup?
It’s strongly discouraged. Mixing panels with different electrical specifications will cause the entire string to perform at the level of the weakest panel, dramatically reducing your system’s efficiency and potentially damaging equipment.
What happens if one panel fails in my configuration?
If a panel fails in a series string, that entire string stops producing power, but your parallel string continues working. This is why the series-parallel configuration offers better redundancy than a purely series system where one failure would shut down everything.
Do I need a special inverter for 8 panels in series-parallel?
You need an inverter rated for your combined voltage and amperage output. For a typical 2S4P setup with 300W panels, you’d need an inverter handling around 120-140V DC input and 20-25 amps, but always verify with your specific panel specifications.
How does shading affect this configuration?
Shading on even one panel in a series string reduces that entire string’s output. With two parallel strings, a shaded panel affects only half your system rather than the whole array, which is why proper placement away from trees and roof obstructions matters so much.
Can I expand this system by adding more panels later?
Yes, but you’ll need to add panels in matching configurations. You could add another 2S4P set wired in parallel to your existing setup, effectively doubling your capacity while maintaining the same voltage.
Understanding these scenarios helps you make informed decisions about your installation and prepares you for real-world performance. The 8-panel series-parallel configuration gives you flexibility and resilience that simpler wiring methods can’t match.
If you’re uncertain about any aspect of your specific setup, particularly regarding inverter compatibility or expansion possibilities, consult your equipment manuals or reach out to the manufacturer’s technical support before making connections. Your system’s longevity depends on getting these details right from the start.
Wiring 8 solar panels in series-parallel might seem daunting at first, but with the right preparation and methodical approach, it’s absolutely achievable for dedicated homeowners. You’ve learned how to balance voltage and amperage, select proper materials, and execute each connection safely, skills that translate directly into efficient, reliable power for your home.
That said, don’t rush the process. Double-check every connection, verify voltage readings, and prioritize safety above all else. If you’re uncertain about final inverter connections or local electrical codes, bringing in a licensed professional for the last mile isn’t a compromise, it’s smart planning.
This configuration represents something bigger than just solar panels. It’s the same tailored, detail-oriented approach that defines every aspect of building your dream home: understanding your needs, selecting the right components, and executing with precision to create something that serves your family for years to come.