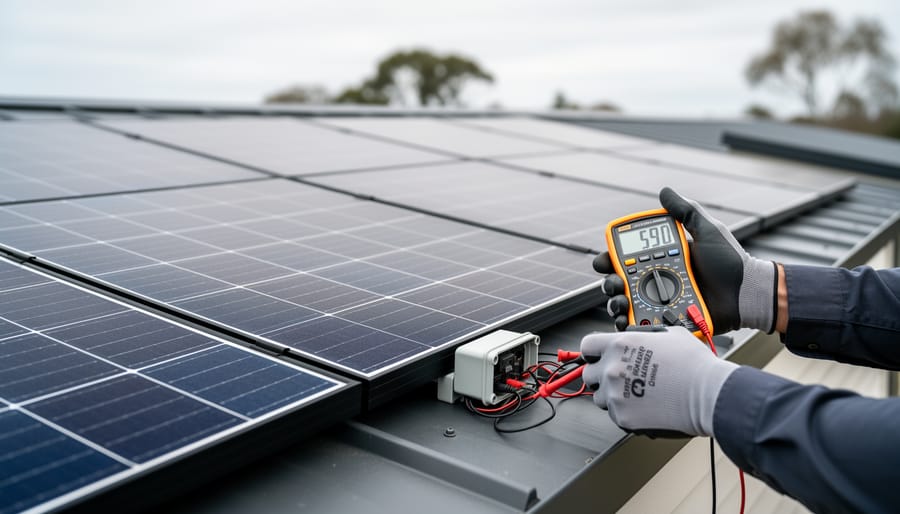
Testing your solar panels regularly ensures your investment performs at peak efficiency and delivers the energy savings your family deserves. You can monitor most aspects of your home solar system using basic tools like a multimeter and your system’s monitoring app, checking output voltage, current production, and overall performance in 15 to 30 minutes each season. Professional testing becomes necessary when performance drops unexpectedly or during your annual system inspection, but routine homeowner checks catch small issues before they become costly repairs.
Your solar panels represent a significant financial commitment to your dream home, and understanding their health gives you confidence that your tailored energy solution works as designed. The process is straightforward: you’ll measure electrical output at key connection points, compare production data against expected benchmarks, and conduct visual inspections for damage or debris. Think of it like checking your car’s oil level, but for the system powering your entire household.
Most homeowners discover that regular testing reveals simple fixes. A layer of dust reducing output by 15 percent, a loose wire connection, or a single underperforming panel among dozens. These discoveries protect your investment and maintain the efficiency you planned for when designing your custom home’s energy strategy.
Just as you’d carefully plan for construction waste disposal during your build, maintaining your solar system requires the same attention to detail and proactive mindset. The good news? You don’t need an engineering degree. With clear guidance on tools, safety protocols, and step-by-step measurements, you’ll know exactly what healthy panels should produce and when to call in expert help.
Why Testing Your Solar Panels Matters
Your solar panels represent a significant investment in your custom home, typically $15,000 to $40,000 depending on system size, and testing ensures you’re getting what you paid for. Many homeowners assume their newly installed system is performing optimally, but without proper verification, you might be losing 10-30% of your expected energy production without realizing it. Testing provides concrete data about whether your panels deliver the kilowatt-hours promised in your contractor’s proposal.
Catching installation defects early saves thousands in lost production and repair costs. Loose connections, improper wiring, shading issues, or damaged panels often go unnoticed until they’ve cost you months of reduced output. A comprehensive test within the first 30-60 days of installation identifies these problems while they’re still covered under workmanship warranties. One homeowner discovered during initial testing that three panels in a 24-panel array were wired incorrectly, reducing system output by 12%, an issue that would have cost $200-300 annually in lost energy savings if left undetected.
Warranty compliance often requires documented proof of proper system operation. Most solar panel manufacturers offer 25-year performance warranties guaranteeing 80-85% output by year 25, but these warranties typically require evidence that panels were functioning properly at installation. Your initial testing results become the baseline for any future warranty claims. Without this documentation, manufacturers may dispute degradation claims, leaving you responsible for replacement costs that could exceed $5,000 per failed panel string.
Testing mirrors the quality assurance philosophy that guided your custom home construction. Just as you verified framing, electrical, and HVAC installations met specifications, solar testing confirms your energy system performs as engineered, protecting the value and functionality of every system in your home.
Tools and Equipment You’ll Need
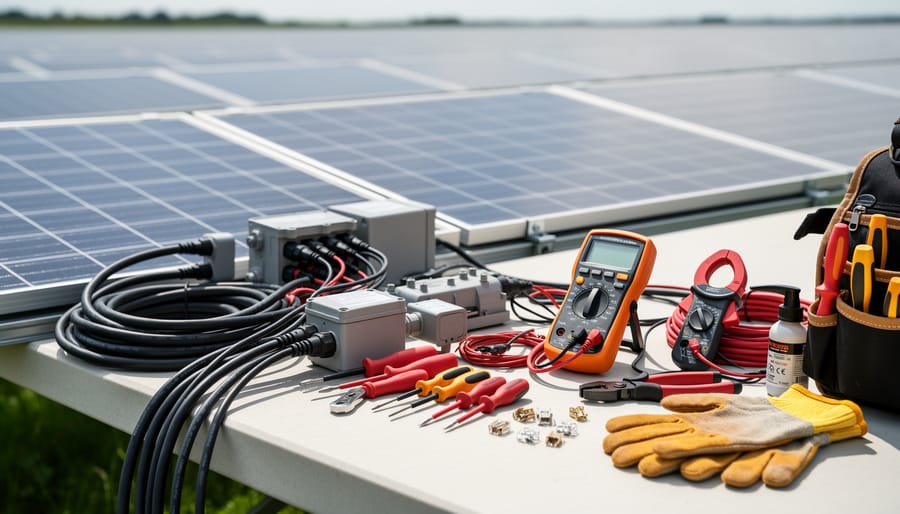
Testing your solar panels properly requires more equipment than you might expect, but much of it is accessible to DIY-savvy homeowners. Understanding what tools you need, and which situations demand professional equipment, helps you approach testing with realistic expectations and appropriate safety.
Essential Testing Equipment
Every homeowner attempting basic solar panel testing needs these fundamental tools:
- Digital multimeter ($30-$100)Measures voltage and current; must handle at least 600V DC and have proper safety ratings
- Clamp meter ($50-$150)Measures current without breaking circuits; essential for testing live systems safely
- Non-contact voltage detector ($15-$40)Confirms whether wires are energized before you touch anything
- Insulated gloves rated for electrical work ($20-$60)Protection against electrical shock when handling junction boxes or connections
- Safety glasses and fall protection harness ($50-$200)Required for any rooftop work; never skip these
These tools cover basic voltage and current testing that verifies whether panels produce power within expected ranges. Most hardware stores carry this equipment, and quality meters from brands like Fluke or Klein provide reliable readings for years.
Advanced Diagnostic Tools
Professional-grade testing requires specialized equipment that most homeowners should rent rather than purchase:
Thermal imaging cameras ($300-$500 to rent, $2,000+ to buy) detect hot spots and cell failures invisible to the eye. Irradiance meters ($200 to rent, $500+ to buy) measure actual sunlight hitting your panels, letting you compare real-world output against theoretical maximum. Some testing companies offer these tools as part of professional assessment packages ($300-$800 for complete testing), which often makes more sense than DIY for annual checkups.
When to Call the Professionals
If your system uses microinverters, optimizers, or exceeds 10kW capacity, professional testing becomes essential. Licensed electricians carry equipment calibrated specifically for solar DC systems and understand the complex electrical codes governing solar installations. They also carry liability insurance that protects your home if something goes wrong during testing, a crucial consideration when working with systems that can deliver lethal voltage.
Critical Safety Warnings Before You Begin
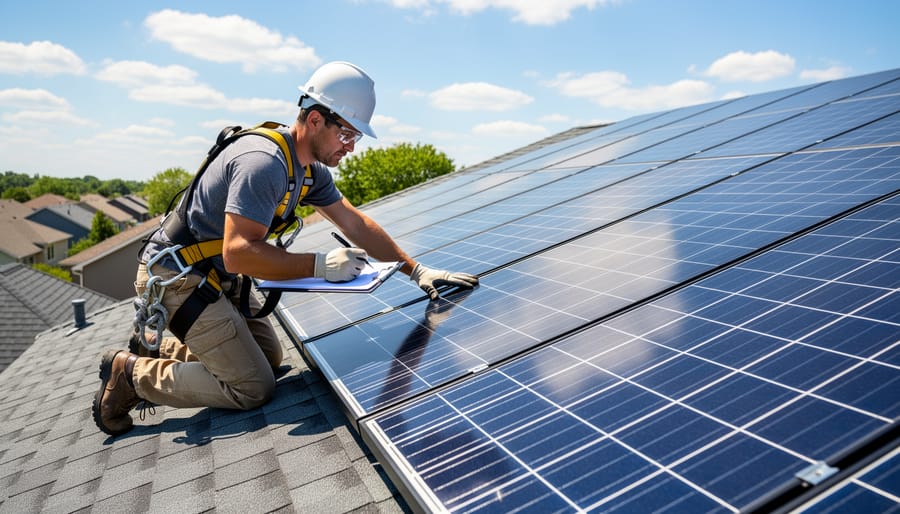
Solar panel testing involves real electrical hazards that demand your full attention and respect. Unlike household AC circuits, solar panels generate high-voltage DC power whenever sunlight hits them, and that power can’t be switched off like flipping a breaker. Even disconnected from your home’s electrical system, an array sitting in daylight remains fully energized and capable of delivering dangerous, potentially lethal voltage.
Never attempt testing in wet conditions, on slippery roofs, or when storms threaten. Rooftop work demands proper fall protection, harnesses, anchor points, and stable footing on a surface that may be angled and sun-heated. If your roof pitch exceeds 6:12 or you’re uncomfortable with heights, hire a professional rather than risk a fall.
Wear insulated gloves rated for electrical work, safety glasses, and rubber-soled shoes. Keep one hand behind your back when taking measurements to prevent current from traveling through your chest. Never touch exposed conductors, bypass safety disconnects, or work inside junction boxes without proper training.
Some tests absolutely require licensed professionals: Any work involving the main service panel, inverter internals, or AC grid connections should be left to certified electricians. If your system uses high-voltage string inverters (300V or more), professional testing is strongly recommended. Similarly, if you discover damaged wiring, burnt components, or anything that looks unsafe during visual inspection, stop immediately and call a qualified solar technician.
Treat your solar testing with the same care you’d give any electrical work or site cleanup activity during your custom home build, thoughtful preparation prevents accidents.
The 7-Step Solar Panel Testing Process
Step 1: Visual Inspection and Physical Assessment
Start your testing with a thorough visual inspection from ground level using binoculars before accessing your roof. Look for obvious cracks across the glass surface, which appear as spider-web patterns or clean breaks that compromise panel integrity. Check for delamination, where the protective layers separate and create bubbles or cloudy areas within the panel, this often signals moisture intrusion and accelerated degradation.
Examine each panel for discoloration, particularly browning or yellowing around cells, which indicates overheating or manufacturing defects. Inspect the aluminum frames for corrosion, bending, or separation from the glass. All mounting hardware should sit flush and secure without gaps or rust.
Move closer to inspect junction boxes on the back of each panel. These weatherproof enclosures house electrical connections and should show no signs of water damage, melting, or burn marks. Check that all conduit connections remain tight and properly sealed. Wiring should have no exposed conductors, fraying, or animal damage.
Call a professional immediately if you spot charred areas around junction boxes, substantial cracks affecting multiple cells, significant frame damage compromising structural integrity, or any evidence of arcing or melting. These conditions create safety hazards and require expert assessment before you proceed with electrical testing.
Step 2: Measuring Open-Circuit Voltage
Open-circuit voltage (Voc) measures the electrical potential your panel generates when nothing is connected to it, essentially its maximum voltage output. This test reveals whether panels are producing proper voltage before they’re put to work, making it a critical diagnostic measurement.
Start by turning off your system at the combiner box or disconnect switch, but leave the panels exposed to sunlight, they’ll still generate voltage. Using your digital multimeter set to DC voltage mode, carefully touch the red probe to the positive terminal and the black probe to the negative terminal at the panel’s junction box. A typical residential panel should read between 30-45 volts in full sun, but check your specific panel’s datasheet for exact specifications.
Temperature significantly affects these readings. Panels produce higher voltage when cold and lower voltage when hot, roughly 0.3-0.5 volts per degree Celsius. On a hot summer afternoon, your panel reading 36 volts might actually be performing perfectly if it’s rated for 40 volts at standard test conditions (25°C).
Compare your reading to the manufacturer’s Voc rating. Results within 5% are excellent; 5-10% low warrants investigation for shading or soiling; anything below that suggests panel degradation or damage. Test each panel in a string to identify underperformers, one weak panel drags down the entire string’s output.
Step 3: Testing Short-Circuit Current
Short-circuit current (Isc) testing measures the maximum current your panel can deliver under direct sunlight when its terminals are connected together. This reading verifies the panel’s fundamental ability to generate electricity and reveals problems that voltage testing might miss.
Set your multimeter to the highest DC amperage setting, typically 10A or 20A. Connect the red lead to the positive terminal and black to negative, creating a direct short circuit. Work quickly, this test should take only a few seconds to avoid overheating your meter. Under full sun conditions (around 1000 W/m²), your reading should be within 90-100% of the panel’s rated Isc.
Lower-than-expected current points to specific issues. If all panels in a string show reduced current proportionally, suspect shading or cloud cover reducing irradiance. When one panel reads significantly lower than its neighbors under identical conditions, you’re likely seeing cell damage, soiling buildup, or internal degradation. Temperature affects current minimally compared to voltage, so dramatic variations usually indicate real problems.
Test during peak sun hours (10 AM to 2 PM) for the most reliable readings and consistency across panels.
Step 4: Checking System Voltage Under Load
Now that you’ve confirmed individual panel performance, it’s time to see how your solar array behaves when actually feeding power to your home. Testing system voltage under load reveals whether panels are delivering proper operating voltage and current when connected to the inverter, the real-world condition that matters most.
With your system fully operational on a sunny day, use your multimeter to measure voltage at the inverter’s DC input terminals. You’re looking for voltage within the inverter’s operating window, typically between 300-600V for residential systems (check your inverter’s specifications). This reading should remain stable, not fluctuating wildly.
Next, verify current flow matches your system size and solar conditions. A 10kW system under full sun should deliver approximately 30-35 amps, depending on your specific panel configuration. Compare these readings against your system’s rated specifications from the installation documentation.
If voltage is too low, you may have excessive wiring losses, poor connections, or underperforming panels in the string. Voltage significantly above specifications can indicate a wiring problem or inverter configuration issue, both situations requiring professional attention to prevent equipment damage.
Step 5: Inverter Performance and Output Verification
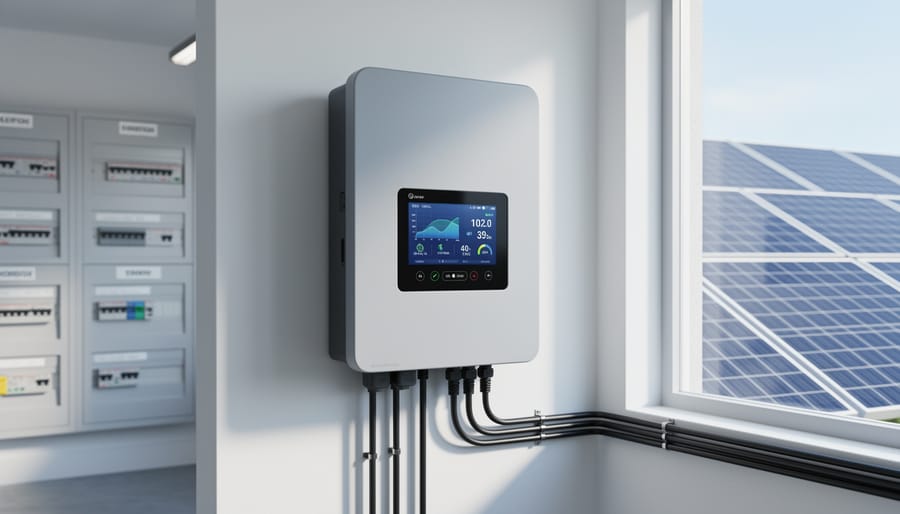
Your inverter transforms the DC electricity from your panels into AC power your home can use, and testing this conversion reveals whether you’re getting the energy you paid for. Start by checking the inverter display screen or accessing its monitoring app, most modern inverters show real-time input from the panels and output to your home.
Compare the DC input power (in kilowatts) to the AC output power. A healthy inverter typically operates at 95-98% efficiency, meaning if you’re seeing 5 kW coming from your panels, expect 4.75-4.90 kW of AC output. Anything below 90% efficiency suggests a problem requiring professional attention.
Next, verify the AC output voltage at your main service panel with your multimeter, it should read 240 volts (±5%) for residential systems. Check that the AC current matches what you’d expect based on your system size and current solar conditions. For example, a 10 kW system producing at 80% capacity in good sun should deliver roughly 33 amps at 240 volts.
Document any error codes displayed on the inverter, as these pinpoint specific issues your installer can address under warranty.
Step 6: Thermal Imaging for Hot Spots
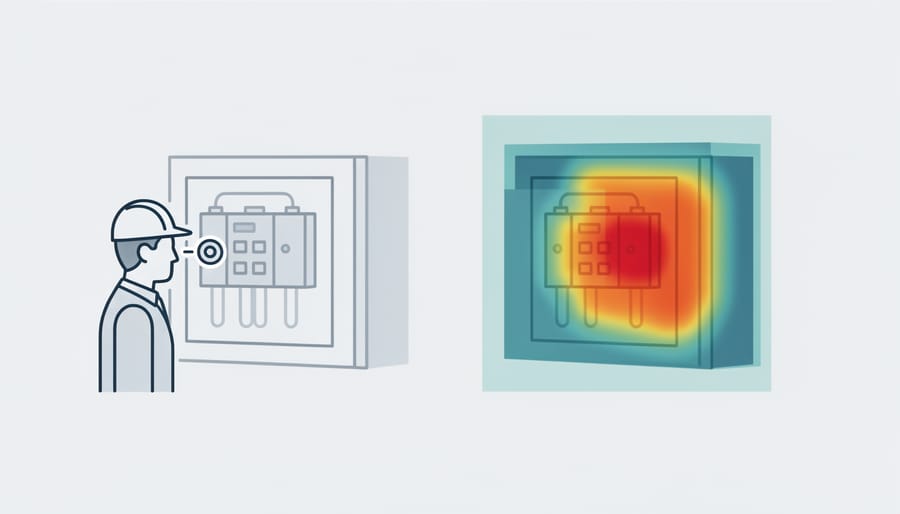
Thermal imaging reveals problems your eyes can’t see. Hot spots, areas running 10°C or more above adjacent cells, indicate failing bypass diodes, cracked cells, or poor connections that will worsen over time.
You’ll need either a dedicated thermal camera ($300-$600) or a smartphone attachment ($200-$400). Test on a sunny day when panels have been producing for at least two hours. The temperature contrast makes defects obvious.
Scan each panel systematically from the same distance. Healthy panels show uniform temperature distribution, typically 40-50°C on a sunny day. Watch for these warning signs: single cells glowing significantly hotter (potential crack or short), entire panel sections running cool (bypass diode failure), or junction boxes showing extreme heat (connection problems).
Document everything with photos and temperature readings. Most thermal cameras timestamp images automatically. Record the ambient temperature, time of day, and recent weather, warranty claims require this context. A single hot cell might be acceptable, but multiple anomalies or temperatures exceeding 85°C demand immediate professional assessment.
Compare your thermal scan to the visual inspection. Hot spots often correspond to physical damage you identified earlier, confirming the connection between visible cracks and electrical problems.
Step 7: Production Data Analysis and Monitoring
Your monitoring system holds the most revealing evidence of how your solar panels actually perform over time. Log into your solar monitoring app or inverter dashboard and pull production data from the past several months. Compare daily kilowatt-hour output against predicted values, most systems include a forecasting tool based on your location and system size.
Look for consistent patterns. Does production dip every afternoon at the same time? That suggests shading from a neighbor’s tree or structure. Gradual decline over months indicates normal soiling that needs cleaning. Sudden drops point to equipment failures or connection issues requiring immediate attention.
Pay special attention to seasonal trends. Summer months should show peak production, while winter output naturally decreases due to shorter days and lower sun angles. What matters is whether your system tracks these expected patterns. If a panel string consistently underperforms relative to others, you’ve identified a specific problem area.
Most homeowners review their solar data quarterly, similar to how they might check their whole-house water filtration maintenance schedule. Set calendar reminders to examine trends, document anomalies with screenshots, and note any correlations with weather events or system changes that could explain performance shifts.
Verifying Results and Next Steps
After completing the seven-step testing process, you’ll have a comprehensive picture of your solar system’s health. Now comes the crucial part: interpreting those numbers and deciding what action, if any, you need to take.
Start by comparing your actual performance against the system’s rated capacity. Under optimal conditions, clear skies around solar noon with clean panels, your system should produce 80-100% of its nameplate rating. If you’re seeing 85-95%, that’s excellent performance. Anything above 80% typically indicates a healthy system, accounting for normal efficiency losses in wiring, inverters, and the panels themselves. Performance below 75% under ideal conditions warrants investigation, while readings below 60% signal significant problems requiring professional attention.
Temperature matters considerably in your interpretation. Panel output drops about 0.4-0.5% for every degree Celsius above 25°C (77°F), so a 95% reading on a hot afternoon may actually represent perfect performance once you account for temperature derating.
Based on your findings, take these actions:
– Everything checks out (80-100% performance): Document your baseline readings, establish a quarterly testing schedule, and continue routine cleaning and monitoring.
– Minor issues detected (70-80% performance, isolated hot spots): Clean panels thoroughly, check for new shading sources, and retest in two weeks. Document findings with photos and readings in case warranty claims become necessary.
– Major problems found (below 70% performance, multiple failed panels, significant voltage discrepancies): Stop here and call your installer or a certified solar technician immediately. Do not attempt repairs yourself, as this could void warranties.
Create a simple testing log that records date, weather conditions, temperature, and all voltage and current readings. This historical data becomes invaluable for tracking gradual degradation, supporting warranty claims, and demonstrating proper maintenance to your insurance company. Schedule follow-up testing every three months during the first year after installation, then twice yearly once you’ve confirmed consistent performance.
Common Questions About Solar Panel Testing
How often should I test my solar panels?
Test panels annually at minimum, plus immediately after severe weather events or if you notice unexplained drops in production. Most custom homeowners schedule testing during spring or fall when conditions are stable, similar to how they plan maintenance for other home systems like water filtration options.
Can I test my panels myself, or do I need a professional?
Basic visual inspections and multimeter voltage checks are safe for most homeowners with proper safety precautions. However, comprehensive testing including thermal imaging, high-voltage measurements, and warranty documentation should be handled by licensed solar technicians who have specialized equipment and training.
What’s the difference between normal degradation and a real problem?
Solar panels typically degrade 0.5-1% per year, so a five-year-old system operating at 95% of rated output is normal. Sudden drops exceeding 10%, performance below 80% of rated capacity, or individual panels producing significantly less than others in the same string indicate problems requiring professional attention.
How much does professional solar panel testing cost?
Expect to pay between $200 and $500 for comprehensive professional testing of a typical residential system, depending on system size and your location. This usually includes thermal imaging, electrical testing, performance analysis, and a detailed report you can use for warranty claims if issues are found.
What factors affect the accuracy of my test results?
Weather conditions have the biggest impact, ideal testing requires clear skies, minimal wind, and temperatures between 60-80°F. Time of day matters too, with midday testing providing the most accurate baseline readings when the sun is at peak angle and irradiance is strongest.
Beyond these common questions, remember that testing becomes easier as you establish a routine. Keep a simple log of your readings, ideally at the same time of year under similar conditions. This historical data helps you spot trends that single tests might miss, making it easier to distinguish between seasonal variations and actual performance issues that need addressing.
Regular solar panel testing isn’t just about troubleshooting problems, it’s about protecting the significant investment you’ve made in your custom home’s energy independence. By incorporating testing into your annual home maintenance routine, right alongside checking your HVAC filters and inspecting your roof, you’ll catch small issues before they become costly repairs.
Most homeowners find that a thorough visual inspection and monitoring system review twice a year takes less than an hour, while the comprehensive seven-step process outlined here makes sense annually or when performance dips. For major milestones, the first year after installation, before warranty expiration, or after severe weather, professional verification provides documentation that protects your investment and validates system performance.
Your solar array represents decades of energy savings and environmental benefits. Treating it with the same care you’d give any other critical home system ensures it delivers the performance you expected when you designed your custom home. Those panels aren’t just equipment on your roof, they’re part of your family’s long-term financial and sustainability goals.